Are you looking to make a statement this year with your wedding invitation? Today we have a great tutorial via the Bridal Guide that will double as a ornament!

Ornament wedding invitations are quick, easy, and inexpensive and will be a great memory to showcase for years to come. To see all the photos and tutorial you can check our Bridal Guide HERE!
Materials Needed:
- Wedding invitation
- Large 4” globe ornament
- Your choice of glitter or paint (you can also use both)
- Ribbon
- Mod Podge
- Scissors
- Paper trimmer
- Paint brush
Directions
Step 1: Assemble the Paper Strips
- Assemble the Paper Strips. Gather your invite card, RSVP card, and map card (if you have one).
- Use the paper trimmer to cut the invitation into thin strips of paper. Be careful not to slice through important words! Also, make sure that your strips are able to fit through the opening of your ornament.
- Next, run the paper strips over your scissors, just like you would to curl a ribbon. Some types of paper will curl much easier than others— wrap it into a curl shape as best as you can.
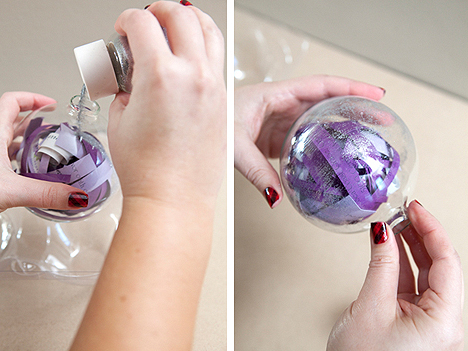
- Then, piece by piece, insert each paper strip into your ornament. Alternate colors, so that the ornament is more eye-catching!
- Shake your ornament around to get the papers to mesh together (the ornament looks best when it’s packed full of paper).
Step 2: Add Glitter
- Below BG added a little glitter to the inside of the globe for some extra sparkle. You can see this ornament HERE!

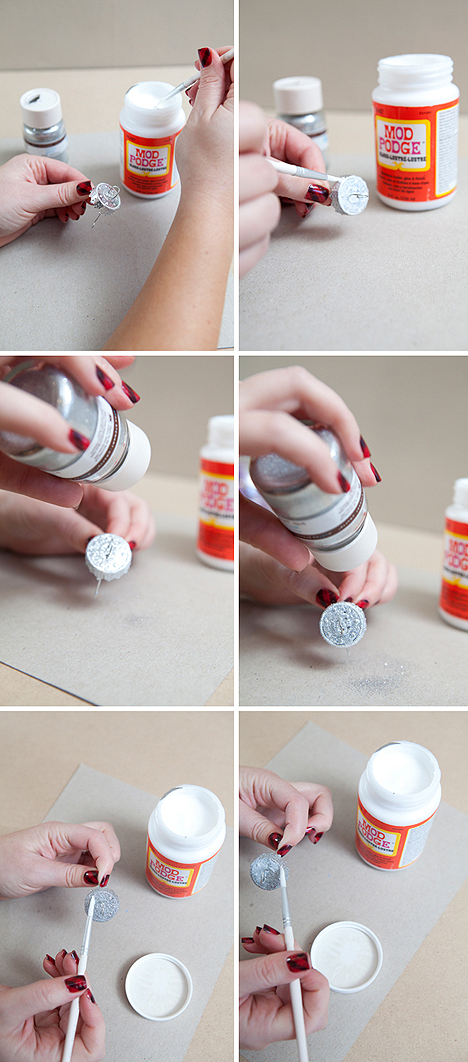
- Next, it’s time to decorate the silver top of the ornament. Layer it with Mod Podge, then cover with glitter. Once it’s completely dry, add a second coat of Mod Podge to seal the glitter.

Step 3: Put the Finishing Touches
- Finish by putting your glittery top in place and tying an oversized bow.
There you have it, a fabulous addition to any tree! 🙂


